Infinix Note 40 Pro review: A hot Note
Sleek, curvy, suave. Those three words aptly describe the Infinix smartphone that I have had for a month: the Infinix...
Read moreFEATURED NEWS


Samsung’s Good Lock app comes to the Play Store

Samsung's Good Lock application has been around for a while and remains a darling of many a Samsung Gaalxy smartphone...
Read moreXiaom Kenya’s May sales promotion sees discounts for Redmi 12 and Redmi A3 smartphones

Xiaomi is having a May sales promotion in Kenya. Through local distributor Xiaomi Kenya, the Chinese brand is running a...
Read moreInfinix Note 40 Pro MagPad can charge your friend’s iPhone

The Infinix Note 40 Pro boasts a remarkable charging solution that extends its capabilities beyond the typical Android phone. One...
Read moreReviews


Listen to our Podcast


How To


More News

March 2024 security update rolling out to Chromecast with Google TV
My Chromecast with Google TV has just picked up a new March 2024 update, so you should also check your...
Read more


Infinix Note 40 Pro review: A hot Note


Latest Post

Infinix Note 40 Pro review: A hot Note
Sleek, curvy, suave. Those three words aptly describe the Infinix smartphone that I have had for a month: the Infinix...
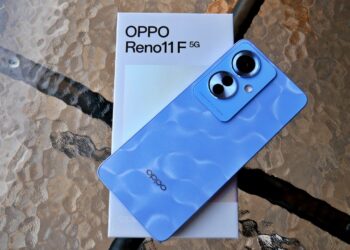
Oppo Reno11 F 5G review: More for (relatively) less
F for fun? To be honest, I don't know but, it's been a fun device to have and to use....

OpenAI prepares to challenge Google Search
OpenAI is set to announce a competitor to Google Search on May 13, according to sources familiar with the matter...
X is adding a “Chromecast” button to the iOS app
I have some good news for X users who enjoy watching content on the big screen, but only for those...
Here are the best-selling smartphones in January 2024 for top 8 countries
Just like in 2023, a recent report by Counterpoint Research on the top 5 smartphone models sold in January 2024...